Why did my pork roast come out tough?
There is nothing more disappointing than spending time and effort preparing a delicious pork roast, only to have it turn out tough and chewy. If you’ve ever experienced this culinary frustration, you’re not alone. Many home cooks struggle with achieving that perfect tender and juicy pork roast. There are several factors that can contribute to a tough pork roast, and understanding these reasons can help you avoid future disappointments in the kitchen.
Lack of Proper Cooking Time
One of the most common reasons for a tough pork roast is not cooking it for long enough. Pork needs to reach a certain internal temperature to become tender and safe to eat. The recommended cooking time and temperature vary depending on the cut and size of your roast, so it’s essential to use a reliable meat thermometer to ensure it reaches the appropriate level of doneness. Undercooking will result in tough meat, while overcooking can lead to dryness and loss of flavor.
Using the Wrong Cut of Pork
The choice of pork cut plays a significant role in the tenderness of your roast. Some cuts are naturally tougher than others and require longer cooking times or different cooking methods to achieve tenderness. For example, pork shoulder or butt, which contain more connective tissue, benefit from slow cooking methods like braising or roasting at low temperatures. On the other hand, tenderloin or loin cuts are leaner and cook more quickly.
Skipping the Brining Step
Brining involves soaking the pork in a solution of salt, sugar, and water before cooking. This process helps to enhance the flavor, moisture, and tenderness of the meat. The salt in the brine helps to break down the proteins, resulting in a juicier and more tender roast. If you skipped the brining step, your pork roast may have turned out tough and lacking in flavor.
Insufficient Marinating Time
Marinating is another technique that can greatly improve the tenderness of your pork roast. A marinade typically consists of an acidic ingredient like vinegar or citrus juice, combined with herbs, spices, and oil. The acid in the marinade helps to break down the muscle fibers, resulting in a more tender and flavorful meat. However, it’s essential to marinate the pork for an adequate amount of time to allow the flavors and tenderizing agents to penetrate the meat fully.
Not Allowing for Resting Time
Resting the cooked pork roast before carving is crucial for maintaining its juiciness and tenderness. When you remove the roast from the oven or grill, the internal temperature continues to rise due to residual heat. Allowing the roast to rest for about 10-15 minutes enables the juices to redistribute throughout the meat, resulting in a more tender and moist final product.
“Proper cooking time, choosing the right cut of pork, brining, marinating, and resting are all key factors in preventing a tough pork roast.”
By paying attention to these important factors, you can ensure that your next pork roast turns out tender, juicy, and full of flavor. Experimenting with different cooking methods, cuts, and seasonings can also help you find your preferred way of preparing this classic dish. So, don’t be discouraged if your first attempts didn’t go as planned—practice makes perfect, and with a bit of knowledge and patience, you’ll soon be serving up perfectly tender pork roasts to impress your family and guests.
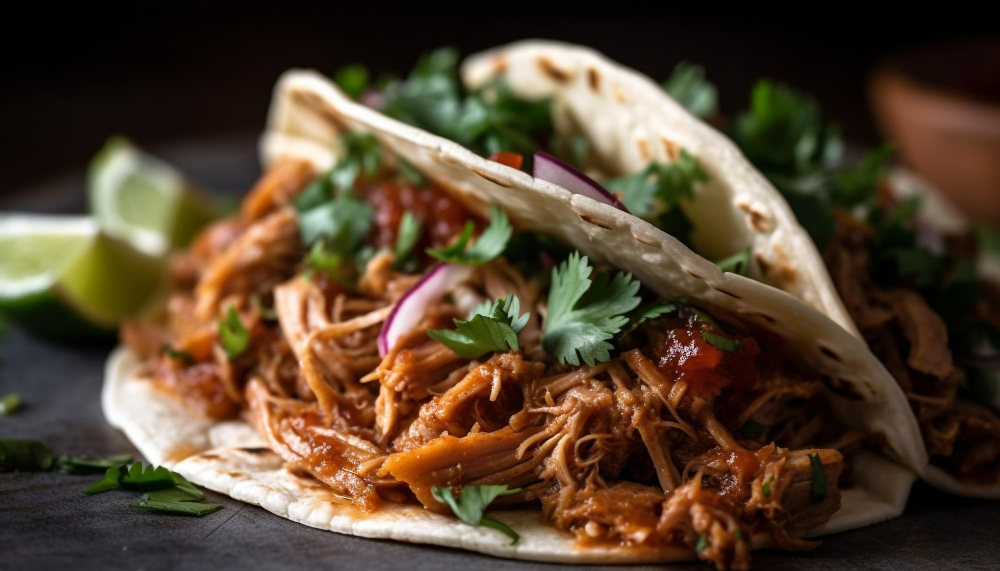
Do you let pulled pork rest in foil?
If you are a fan of barbecue, then you’ve probably heard of pulled pork. It’s a delicious and tender meat that is cooked low and slow until it reaches the perfect temperature for shredding. But after your pulled pork is done cooking, should you let it rest in foil? Let’s find out.
The importance of resting pulled pork
Resting pulled pork is an essential step in the cooking process. It allows the meat to reabsorb its juices and redistribute the flavors, resulting in a more tender and flavorful end product. Resting also helps the meat retain moisture, preventing it from drying out.
The role of foil in the resting process
Foil can be used to wrap pulled pork during the resting period. It helps to trap the heat and keep the meat warm, allowing it to continue cooking indirectly. Additionally, the foil helps to retain the moisture of the meat, preventing it from evaporating too quickly.
How to correctly rest pulled pork in foil
When resting pulled pork in foil, follow these simple steps:
- Remove the pork from the heat source once it reaches the desired internal temperature (usually around 195°F).
- Wrap the pork tightly in foil to create a sealed package.
- Place the wrapped pork in a cooler or insulated container to keep it warm.
- Let the pulled pork rest for at least one hour, but you can go up to three hours for even better results.
Tip: To enhance the flavor of your pulled pork, you can add some barbecue sauce or marinade to the meat before wrapping it in foil.
Did you know? Resting pulled pork is similar to resting other types of meat, such as steaks or roasts. It allows the juices to redistribute, resulting in a more tender and flavorful end product.
In conclusion, letting pulled pork rest in foil is an important step in the cooking process. The foil helps to retain moisture and keep the meat warm, allowing it to continue cooking indirectly. By following the proper resting technique, you’ll achieve tender, juicy, and flavorful pulled pork that will be a hit at your next barbecue gathering.
What is the most tender and juicy cut of pork?
Pork, a versatile and delicious meat, offers a wide variety of cuts. When it comes to tenderness and juiciness, one particular cut stands out: the pork tenderloin.
The Pork Tenderloin
The pork tenderloin is a lean, boneless cut that comes from the muscle running alongside the backbone. It is often referred to as the “filet mignon” of pork due to its tenderness and delicate flavor.
With its low fat content and fine-grained texture, the pork tenderloin is perfect for quick cooking methods such as grilling, stir-frying, or roasting. Its mild flavor allows it to pair well with various seasonings, marinades, and sauces, making it a versatile choice for many recipes.
Cooking Tips
- When cooking pork tenderloin, it is important not to overcook it to maintain its tenderness. The recommended internal temperature is 145°F (63°C) followed by a three-minute rest.
- Marinating the pork tenderloin before cooking can add flavor and help to keep it moist. Try marinating it in a mixture of olive oil, garlic, herbs, and your preferred seasonings.
- For an extra burst of flavor, consider wrapping the pork tenderloin in bacon before cooking. The bacon lends its smoky and salty essence to the meat.
Recipes to Try
If you’re looking to explore the wonderful taste of pork tenderloin, here are a couple of recipes worth trying:
Pork Tenderloin with Honey Mustard Glaze: A sweet and tangy glaze made with honey, Dijon mustard, and herbs creates a delightful flavor combination with the tender pork.
Balsamic Herb Grilled Pork Tenderloin: Marinated in a balsamic herb mixture, this grilled pork tenderloin is packed with flavor and pairs perfectly with grilled vegetables.
Whether you prefer it grilled, roasted, or stir-fried, the pork tenderloin offers a melt-in-your-mouth experience that is sure to satisfy your taste buds. Its tenderness and juiciness make it an ideal choice for any pork lover.
How do you not overcook pork roast?
Pork roast is a delicious and popular dish in the UK, but it can be challenging to cook it just right. Overcooking can result in dry and tough meat, which nobody wants. Here are some tips on how to ensure your pork roast stays juicy and perfectly cooked:
1. Choose the right cut of pork:
When selecting a pork roast, opt for cuts with a bit of marbling or fat, such as pork loin or shoulder. This will help keep the meat moist during cooking.
2. Use a meat thermometer:
The best way to avoid overcooking is by using a digital meat thermometer. Insert it into the thickest part of the roast, making sure it doesn’t touch the bone. Cook the pork until it reaches an internal temperature of 145°F (63°C) for medium doneness.
3. Brine or marinate the pork:
Brining or marinating the pork before cooking can help infuse it with flavor and retain moisture. Consider marinating the roast in a mixture of herbs, spices, and acidic ingredients like cider vinegar or lemon juice.
4. Use a roasting pan with a rack:
A roasting pan with a rack allows the heat to circulate evenly around the pork roast, preventing it from sitting in its own juices. This helps the meat cook more evenly and reduces the risk of overcooking.
5. Let it rest:
After removing the pork roast from the oven, allow it to rest for about 10-15 minutes before slicing. This resting period allows the juices to redistribute, resulting in a more tender and flavorful piece of meat.
Remember, a little pinkness in the center of the pork is perfectly safe to eat as long as it reaches the recommended internal temperature. Trust your meat thermometer rather than relying on visual cues alone.
To assist you further, here’s a table with suggested cooking times for different cuts of pork roast:
| Cut | Cooking Time |
|---|---|
| Pork Loin (boneless) | 20 minutes per pound at 350°F (175°C) |
| Pork Shoulder (bone-in) | 25 minutes per pound at 325°F (165°C) |
By following these tips and using a meat thermometer, you can avoid overcooking your pork roast and enjoy a succulent and flavorful dish every time.
Do you tent foil over pork?
When it comes to cooking pork, there are several techniques that can be used to achieve a juicy and flavorful result. One such technique is tenting foil over the pork during the cooking process. This method involves loosely covering the pork with foil to help retain moisture and promote even cooking.
The Benefits of Tenting Foil over Pork
Tenting foil over pork has several benefits:
- Moisture retention: By trapping steam and moisture, tenting foil helps prevent the pork from drying out during cooking, resulting in a more tender and succulent meat.
- Even cooking: The foil acts as a barrier, distributing heat evenly and preventing hot spots, which helps ensure that the pork cooks uniformly.
- Flavor infusion: Tenting foil also helps lock in the flavors of any seasonings or marinades used, allowing the pork to absorb them while cooking.
How to Tent Foil over Pork
Here’s a simple step-by-step guide on how to tent foil over pork:
- Preheat your oven to the recommended temperature for the pork you’re cooking.
- Season the pork according to your preference.
- Place the seasoned pork in a roasting pan or on a baking sheet.
- Create a loose tent shape with a large piece of aluminum foil, making sure it covers the entire pork.
- Gently drape the foil over the pork, ensuring that it is not tightly sealed.
- Press the edges of the foil down onto the sides of the pan to secure it in place.
- Place the pan with the foil-covered pork in the preheated oven and cook according to the recommended cooking time.
- During the last few minutes of cooking, you can uncover the pork to allow the surface to brown, if desired.
“Tenting foil over pork is a great way to achieve moist and tender meat. It helps retain moisture, promotes even cooking, and enhances flavor.”
Remember that tenting foil over pork is not necessary for all cuts or cooking methods. It is most commonly used for roasts, larger cuts, or when slow cooking to maintain moisture. Smaller cuts or those being grilled or pan-seared may not require tenting foil.
Ultimately, whether you choose to tent foil over your pork will depend on the specific recipe and desired outcome. Experimenting with different cooking techniques can help you find the method that produces the best results for your taste preferences.
Why do you soak pork in milk?
Soaking pork in milk is a common technique used to tenderize the meat and remove any potential gaminess or unpleasant flavors. This method is particularly popular in the UK, where it is believed to enhance the taste and texture of pork dishes.
The Science Behind It
When pork is soaked in milk, the lactic acid present in the milk helps break down tough muscle fibers, resulting in a more tender and juicy meat. The enzymes in the milk further aid in the tenderization process, making the pork easier to chew and digest.
Additionally, soaking pork in milk can help eliminate any strong odors or flavors that are sometimes associated with certain cuts of pork. This is especially true for pork that has been raised on a more robust diet, which can lead to a gamey taste. Milk acts as a natural deodorizer, helping to neutralize these unwanted flavors.
How to Soak Pork in Milk
To soak pork in milk, simply place the meat in a shallow dish or resealable bag and cover it with enough milk to completely submerge it. Leave the pork to marinate in the refrigerator for at least 30 minutes, although overnight soaking is often recommended for maximum tenderness.
Here’s a simple step-by-step guide:
- Choose the desired cut of pork.
- Place the pork in a dish or bag.
- Pour enough milk over the pork to fully cover it.
- Refrigerate and let it soak for at least 30 minutes, or overnight if preferred.
- Remove the pork from the milk and pat it dry before cooking.
- Proceed with your chosen recipe or cooking method.
Best Cuts of Pork for Soaking in Milk
While most cuts of pork can benefit from being soaked in milk, some particularly tough or less tender cuts may benefit the most. These include:
Pork chops
Pork shoulder
Pork tenderloin
Pork ribs
Soaking these cuts in milk can help break down the connective tissues and result in a more enjoyable eating experience.
Next time you’re preparing pork, consider giving it a milk bath to enhance its tenderness and flavor. It’s a simple technique that can make a noticeable difference in your final dish!