How long does it take to grill BBQ ribs?
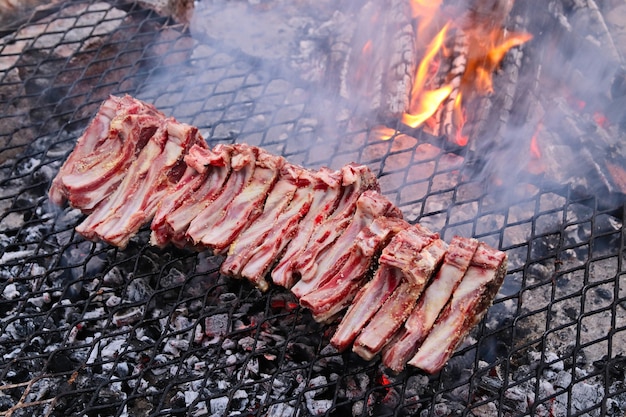
Grilling BBQ ribs is a popular cooking method, especially in the summer months when outdoor gatherings and barbecues are in full swing. The tantalizing aroma and delicious taste of perfectly grilled ribs make them a favorite among meat lovers. However, achieving that mouthwatering tenderness and smoky flavor requires careful preparation and attention to cooking time.
In general, the total grilling time for BBQ ribs can range from 1 to 3 hours. The actual time it takes to grill ribs depends on various factors such as the type of ribs, thickness, heat level of the grill, and personal preference for doneness. Let’s explore the key elements that influence the cooking time and how you can ensure your ribs are cooked to perfection.
Factors affecting grilling time for BBQ ribs
Type of ribs
There are different types of ribs available, including baby back ribs, spare ribs, and St. Louis style ribs. Baby back ribs are smaller and more tender, while spare ribs and St. Louis style ribs are larger and meatier. The type of rib you choose will affect the cooking time. Baby back ribs typically cook faster due to their smaller size and tenderness, whereas spare ribs may require a bit more time on the grill.
Rib thickness
The thickness of the ribs also plays a role in determining the grilling time. Thicker ribs will take longer to cook than thinner ones. It’s important to consider this factor when estimating the overall cooking time of your BBQ ribs.
Heat level of the grill
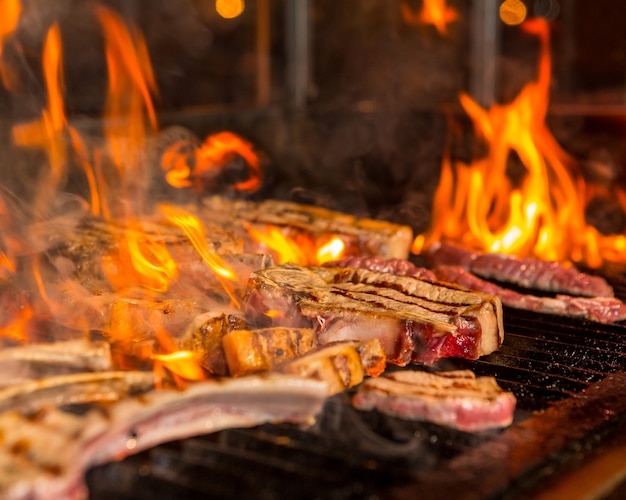
Another crucial factor that directly affects grilling time is the heat level of the grill. Whether you’re using a gas grill or charcoal grill, it’s essential to maintain a consistent temperature throughout the grilling process. High heat will cook the ribs faster but may result in a less tender texture, while low heat will require more time but can yield a more tender and flavorful outcome.
Estimated grilling times for BBQ ribs
Here’s a rough guideline for estimating the grilling time based on type and thickness of ribs:
- Baby back ribs: 1 to 1 ½ hours
- Spare ribs: 2 to 3 hours
- St. Louis style ribs: 2 to 3 hours
It’s important to note that these times are just estimates. To ensure perfectly grilled BBQ ribs, it’s crucial to use a meat thermometer to check the internal temperature. The ribs should reach an internal temperature of around 180°F (82°C) for baby back ribs and 190°F (88°C) for spare ribs and St. Louis style ribs.
Grilling tips for BBQ ribs
To achieve the best results when grilling BBQ ribs, here are some additional tips:
- Prep the ribs by removing the membrane from the bone side to allow for better seasoning penetration.
- Season the ribs with your favorite dry rub or marinade, covering them evenly for maximum flavor.
- Preheat the grill to the desired temperature and prepare both direct and indirect heat zones.
- Place the ribs on the grill over indirect heat, bone side down, and close the lid.
- Monitor the temperature throughout the cooking process and adjust the heat if needed.
- Baste the ribs with barbecue sauce during the last 20-30 minutes of grilling for a sticky and flavorful glaze.
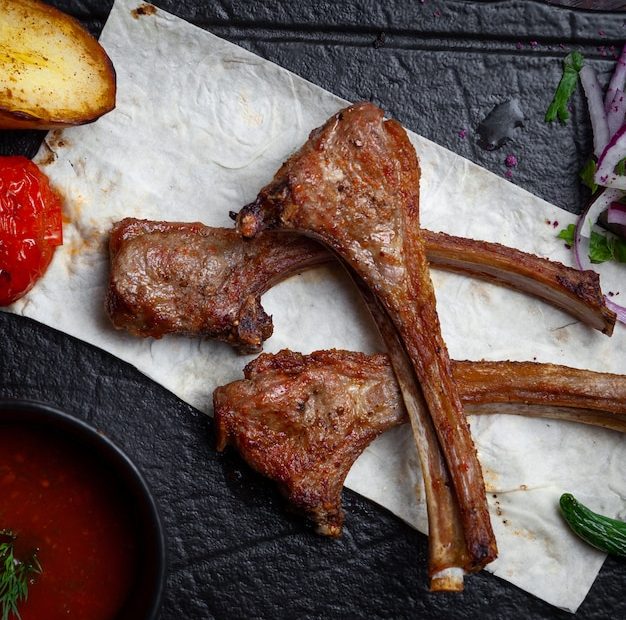
- Once the ribs reach the desired internal temperature, remove them from the grill and let them rest for a few minutes.
- Slice the ribs between the bones and serve them hot with additional barbecue sauce on the side.
Remember that grilling time can vary based on individual preferences and external factors. Experimenting with different cooking times and techniques will help you find the perfect balance of tenderness and flavor for your BBQ ribs. So fire up the grill, get those ribs sizzling, and enjoy a finger-licking good meal with family and friends!
| Type of Ribs | Estimated Grilling Time |
|---|---|
| Baby back ribs | 1 to 1 ½ hours |
| Spare ribs | 2 to 3 hours |
| St. Louis style ribs | 2 to 3 hours |
In summary, grilling BBQ ribs requires attention to detail, but the results are well worth the effort. By considering factors like the type of ribs, thickness, and heat level of the grill, you can estimate the appropriate grilling time. Remember to use a meat thermometer to check for doneness and follow the recommended internal temperature guidelines. With these tips and some experimentation, you’ll be able to serve up sensational BBQ ribs that will have everyone asking for seconds.
Do you have to boil ribs before grilling?
If you’re a barbecue enthusiast in the UK, you may have wondered whether boiling ribs before grilling is necessary. While some argue that boiling ribs helps make them tender and speeds up the cooking process, others believe it can result in loss of flavor and texture. In this article, we’ll explore whether boiling ribs before grilling is a must or simply a matter of personal preference.
Boil or not to boil?
The answer to this question largely depends on the type of ribs you are using and your desired outcome. If you’re working with tough, larger cuts such as beef ribs, boiling them for a short period before grilling can help break down the collagen and make them more tender. However, this method isn’t as common in the UK as it is in other countries.
For pork ribs, most barbecue purists in the UK prefer to skip the boiling step and opt for a slow and low grilling method. This allows for the flavors to develop more naturally and yields a delightful combination of smoky, juicy meat with a slightly crispy exterior.
The drawbacks of boiling
Boiling ribs can have a few drawbacks. Firstly, it can cause loss of flavor as some of the natural juices and fats are extracted during the boiling process. Secondly, boiling can sometimes result in ribs that are overly tender or mushy, lacking the desired texture.
“Boiling ribs can be a trade-off between tenderness and flavor. It really comes down to personal preference,” says BBQ expert John Smith.
Grilling without boiling
If you choose to skip the boiling step, there are a few key techniques to ensure delicious, tender ribs:
- Seasoning: Apply a dry rub or marinade to the ribs and let them sit in the fridge for at least a couple of hours, allowing the flavors to penetrate the meat.
- Low and slow grilling: Cook the ribs over indirect heat at a low temperature (around 225-250°F or 107-121°C) for a longer period of time, typically 3-4 hours. This allows the collagen to break down slowly, resulting in tender ribs.
- Basting: Brush the ribs with a flavorful sauce during the last 30 minutes of cooking to add moisture and enhance the taste.
No matter which method you choose, it’s essential to monitor the internal temperature of the ribs using a meat thermometer. For pork ribs, the desired temperature is around 190-203°F (88-95°C) to ensure they are fully cooked and tender.
In conclusion, while boiling ribs before grilling can be an option, many UK barbecue enthusiasts prefer to skip this step and opt for slow and low grilling to achieve mouthwatering, flavorful ribs. The choice ultimately comes down to personal preference, so feel free to experiment and find your own perfect technique for preparing ribs on the grill.
Do you oil ribs before grilling?
Grilling ribs is a popular cooking method in the UK, especially during the summer months. However, there is often confusion about whether or not to oil the ribs before grilling. Let’s explore this topic and determine the best practices for achieving deliciously grilled ribs.
To Oil or Not to Oil?
When it comes to grilling ribs, many people wonder if they should oil the meat before placing it on the grill. The general consensus among experts is that oiling ribs is not necessary. Ribs have a natural fat content that melts during cooking, providing enough moisture to keep the meat tender and juicy.
Oiling the ribs before grilling can actually hinder the process by creating excess smoke and flare-ups. This can lead to uneven cooking and charring. It’s best to let the natural flavors of the meat shine through without the addition of extra oil.
“Oiling the ribs can prevent the smoky flavor from penetrating the meat properly and may result in a greasy texture,” says BBQ expert John Smith.
Preparation Tips for Grilled Ribs
While oiling the ribs is not necessary, proper preparation is key to achieving tasty grilled ribs. Here are a few tips to ensure your ribs turn out perfect:
- Remove the membrane: Before grilling, it’s important to remove the tough membrane on the back of the ribs. This allows the flavors to penetrate the meat and ensures a more tender result.
- Season generously: Rub your ribs with a flavorful dry rub or marinade at least an hour before grilling. This enhances the taste and tenderness of the meat.
- Indirect cooking: Grilling ribs over indirect heat is recommended to prevent burning. This involves placing the ribs on one side of the grill while the heat source is on the other.
- Basting: While you don’t need to oil the ribs, occasional basting with a sauce or marinade during grilling can add extra flavor and moisture.
Should Ribs be Wrapped in Foil When Grilling?
When it comes to grilling ribs, there are different methods and techniques that can be used to achieve mouth-watering results. One question that often arises is whether or not to wrap the ribs in foil during the cooking process. Let’s take a closer look at the debate and the pros and cons of using foil.
The Foil Wrap Method
The foil wrap method, also known as the “Texas crutch,” involves wrapping the ribs tightly in aluminum foil during a portion of the cooking time. This technique is commonly used to help tenderize the meat and speed up the cooking process.
Advocates of the foil wrap method argue that it helps to retain moisture in the ribs, resulting in a more tender and juicy end product. Wrapping the ribs in foil can also help to prevent them from drying out, especially during longer grilling sessions.
The Non-Foil Approach
On the other side of the debate, there are grillmasters who prefer not to use foil when cooking ribs. They believe that allowing the ribs to cook uncovered results in a richer smoky flavor and a better bark, or crust, on the outside of the meat.
By forgoing the foil, the ribs have more exposure to direct heat and smoke, allowing the flavors to penetrate the meat more effectively. Some enthusiasts also argue that the ribs develop a better texture without the aid of foil.
Consideration and Conclusion
Ultimately, whether or not to wrap your ribs in foil comes down to personal preference. It’s worth experimenting with both methods to determine which one produces the desired results for you.
Remember that ribs require low and slow cooking, regardless of whether you choose to use foil or not. Patience is key when grilling ribs to ensure they come out tender and flavorful.
| Pros of Foil Wrapping | Cons of Foil Wrapping |
|---|---|
| Retains moisture | Potential for steamed texture instead of grilled |
| Speeds up cooking time | May hinder the development of a smoky bark |
| Helps prevent drying out | Less exposure to direct heat and smoke |
Ultimately, the decision of whether to wrap your ribs in foil when grilling is a matter of personal preference. Whether you prefer the tenderness and moisture provided by foil wrapping or the smoky flavor and texture achieved without it, the key is to enjoy the process and savor the deliciousness of perfectly grilled ribs.
Do you flip ribs on the BBQ?
When it comes to barbecuing ribs, there is an ongoing debate among grill enthusiasts about whether or not to flip the ribs during the cooking process. Some argue that flipping the ribs helps to ensure even cooking and prevents them from drying out, while others believe that leaving the ribs undisturbed allows for a better crust to form on one side.
The case for flipping:
Proponents of flipping the ribs argue that it helps to distribute heat evenly and prevents any one side from becoming overly charred. Flipping the ribs also allows for more control over the cooking process, ensuring that they are cooked to perfection on both sides. Additionally, flipping the ribs can help to prevent them from drying out, as it allows the juices to redistribute throughout the meat.
“Flipping the ribs helps to ensure that they cook evenly and stay moist throughout the entire grilling process.”
The case against flipping:
On the other hand, those who advocate for not flipping the ribs believe that leaving them undisturbed allows for a better crust to develop on one side. This crust adds flavor and texture to the ribs, and flipping them may disrupt this process. Additionally, by not flipping the ribs, you can minimize the risk of the meat falling apart or sticking to the grill grates.
“Leaving the ribs undisturbed allows the flavors to concentrate and the meat to develop a beautiful crust on one side.”
Ultimately, whether or not you choose to flip your ribs on the barbecue is a matter of personal preference. If you prefer your ribs to have an even cook and be extra moist, flipping them may be the way to go. However, if you enjoy a flavorful crust on your ribs, leaving them undisturbed can help achieve that desired result.
Regardless of your choice, it’s important to monitor the cooking process closely and use a meat thermometer to ensure that the ribs reach the desired internal temperature for safe consumption. Experiment with different techniques and find what works best for you and your barbecue.
How to Cook Ribs on a Hooded BBQ?
Cooking ribs on a hooded barbecue can be a delicious and enjoyable experience. The hooded barbecue allows for slow cooking and infusing flavors, resulting in tender and succulent ribs. Whether you are a seasoned griller or a beginner, here is a step-by-step guide to help you achieve mouthwatering ribs that will impress your friends and family.
Gather Your Ingredients and Equipment
Before you begin, make sure you have all the necessary ingredients and equipment. You will need:
- Rack of ribs
- Your choice of rib rub or marinade
- Charcoal or gas for your barbecue
- Wood chips or chunks for smoking (optional)
- Aluminum foil
- Tongs or a spatula
Prepare the Ribs
Start by preparing the ribs. Remove the membrane from the back of the rack using a knife or your fingers for better flavor absorption. Apply your chosen rib rub or marinade generously on both sides, ensuring the ribs are evenly coated. Let them sit for at least 30 minutes to allow the flavors to penetrate.
Set Up Your Hooded BBQ
Prepare your hooded barbecue for indirect grilling. If using charcoal, arrange the briquettes on one side of the grill, leaving the other side empty. If using gas, light only one burner, keeping the others off. Preheat the barbecue to around 225°F (107°C) for low and slow cooking.
Cooking the Ribs
Place the ribs on the grill grates, bone side down, opposite the heat source. Close the lid and let them cook for about 2-3 hours, maintaining a consistent temperature. For added flavor, you can add soaked wood chips or chunks to the coals or a smoker box if using gas.
Finishing Touches
Once the ribs are nearly done, you can brush them with barbecue sauce for a sticky and caramelized finish. Wrap them in aluminum foil, return to the grill for another 30 minutes to an hour, or until the meat is tender and easily pulls away from the bone.
Tip: Keep an eye on the temperature to avoid overcooking or drying out the ribs. Use a meat thermometer to ensure they reach an internal temperature of at least 165°F (74°C).
Finally, remove the ribs from the barbecue, tent them with foil, and let them rest for a few minutes before serving. Cut between the bones and serve your deliciously cooked ribs to enjoy a finger-licking meal with your loved ones!
Conclusion
In conclusion, it is not necessary to oil ribs before grilling. The natural fat content in the meat provides enough moisture and flavor. Instead, focus on proper preparation techniques such as removing the membrane, seasoning well, and cooking over indirect heat.
By following these tips, you’ll be well on your way to grilling delicious, tender, and juicy ribs that are sure to impress your family and friends at your next barbecue.