How do you not overcook burgers on the grill?
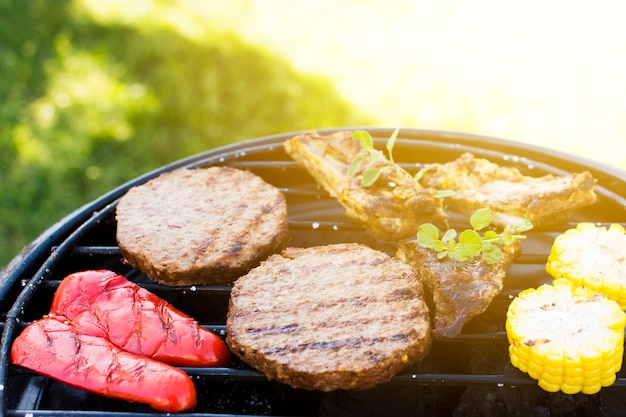
Grilling burgers is a quintessential part of summer barbecues and outdoor gatherings in the UK. However, achieving the perfect level of doneness can be challenging, as overcooking burgers can result in dry and tasteless patties. To help you avoid this culinary mishap and create juicy, flavorful burgers every time, we have put together some essential tips and techniques.
Understanding the Ideal Temperature
One of the keys to preventing overcooked burgers is to understand the ideal cooking temperature. A common mistake is setting the grill too high, resulting in burnt exteriors and undercooked interiors. For beef burgers, it is generally recommended to cook them at medium-high heat, around 375-400°F (190-204°C). This temperature allows for proper browning while ensuring that the burgers cook evenly throughout.
Choosing the Right Meat
The choice of meat plays a crucial role in determining the tenderness and juiciness of your burgers. Opting for ground beef with a higher fat content, such as 80/20 (80% lean meat and 20% fat), can help prevent dryness. The fat adds moisture and flavor to the patties, resulting in a juicier end product. Alternatively, you can mix leaner ground beef with a small amount of bacon or olive oil to achieve a similar effect.
Forming the Perfect Patty
When shaping your burger patties, it is important to handle the meat gently. Overworking or compacting the ground beef can lead to dense and tough burgers. Instead, lightly form the patties by hand, creating an indentation in the center with your thumb. This indentation helps the patty cook evenly and prevents it from puffing up in the middle.
Monitoring Cooking Time
Monitoring the cooking time is crucial to avoid overcooking. Undercooked burgers can be a health risk, while overcooked ones are dry and lacking in flavor. As a general guideline, aim to cook your burgers for about 4-5 minutes per side. However, cooking time may vary depending on the thickness of the patties and personal preference. Using an instant-read meat thermometer can provide a more accurate indication of doneness, with a target internal temperature of 160°F (71°C) for well-done burgers.
Resting and Toppings
Once your burgers reach the desired level of doneness, it is essential to let them rest for a few minutes before serving. This allows the juices to redistribute within the patty, resulting in a more flavorful and moist burger. While resting, you can take the opportunity to prepare your favorite toppings and condiments, such as crisp lettuce, ripe tomatoes, melted cheese, and tangy sauces.
In conclusion, mastering the art of grilling burgers without overcooking them requires attention to detail and some culinary know-how. By understanding the ideal cooking temperature, choosing the right meat, forming the patties correctly, monitoring cooking time, and allowing the burgers to rest, you can achieve perfectly juicy and delicious burgers that will impress your friends and family at your next barbecue gathering.
“The key to a great burger is achieving the perfect balance between juiciness and doneness. Follow these tips to prevent overcooking and enjoy the ultimate burger experience!”
Why Put a Thumbprint in a Burger?
When it comes to making the perfect burger, there are many techniques and tricks that can elevate the taste and texture of this beloved dish. One technique that has gained popularity in recent years is putting a thumbprint in the center of the patty. While it may seem like a small detail, this simple act can have a big impact on the overall deliciousness of the burger.
Enhances Even Cooking
One of the main reasons to put a thumbprint in a burger is to ensure even cooking. By creating a slight indentation in the center of the patty, you prevent it from puffing up in the middle during the cooking process. This helps to maintain an even thickness throughout the burger, resulting in a more consistent doneness and juiciness.
Retains Juiciness
By preventing the patty from puffing up, the thumbprint helps to retain the natural juices within the burger. As the meat cooks, the fat and juices collect in the center, creating a moist and flavorful bite. Without the thumbprint, these juices would be lost, leading to a drier and less enjoyable eating experience.
Creates a Perfect Patty Shape
In addition to improving the cooking process, the thumbprint also helps to create a perfect patty shape. The indentation allows the burger to maintain its shape as it shrinks during cooking, preventing it from becoming too thick or irregularly shaped. This makes for a more visually appealing and professional-looking burger.
“Putting a thumbprint in a burger is a simple yet effective technique that can make all the difference in the final result.”
If you’re unsure when to use this technique, it is particularly useful when grilling or pan-frying burgers. However, if you’re baking or broiling your burgers, this step may not be necessary as they don’t typically puff up as much in those cooking methods.
Next time you’re preparing burgers at home, don’t forget to put a thumbprint in each patty. Your guests will appreciate the even cooking, juiciness, and professional presentation of your delicious homemade burgers.
Why Place an Ice Cube on a Burger While Grilling?
Grilling burgers is a beloved summer pastime in the UK, and many people have their own special techniques for achieving the perfect juicy and flavorful patty. One popular method that might seem counterintuitive is placing an ice cube on top of the burger while it cooks. While it may sound strange, there are actually several reasons why this technique is worth trying.
1. Retaining Moisture
When you place an ice cube on a burger during grilling, the heat causes the ice to melt slowly, releasing moisture into the patty. This helps prevent the burger from drying out, especially if you’re cooking leaner cuts of meat. The result is a juicier and more succulent burger that your guests will love.
2. Keeping the Burger Tender
Adding an ice cube to your burger can also help keep the patty tender. As the ice cube melts, it provides a gentle source of moisture that prevents the proteins in the meat from becoming too tightly packed together. This means your burger will maintain a softer texture, rather than becoming tough and dry.
3. Adding Flavor
Not only does the melting ice cube help retain moisture, but it can also infuse your burger with additional flavor. You can experiment by adding herbs, spices, or even marinades to your ice cubes before placing them on top of the patty. As the ice melts, these flavors are released, creating a unique and delicious taste. It’s a simple way to elevate your burgers to the next level.
So, the next time you fire up the grill, consider giving the ice cube technique a try. Your burgers will be juicier, tender, and bursting with flavor.
“Placing an ice cube on a burger while grilling is a game-changer. It keeps the patty moist, tender, and packed with delicious flavors.” – Grill Master Magazine
Should You Smash Burgers When Cooking?
One of the ongoing debates in the culinary world revolves around the technique of smashing burgers during the cooking process. While some argue that smashing the patty creates a more juicy and flavorful burger, others believe that it causes the loss of precious juices and results in a dryer burger. So, should you smash your burgers when cooking? Let’s dive in and explore both sides of the argument.
Pros of Smashing Burgers
Advocates of smashing burgers argue that the technique helps create a delicious crust on the patty while keeping it juicy on the inside. By pressing down on the patty, you increase its contact with the cooking surface, resulting in a faster sear and caramelization. This can lead to a more intense flavor profile and a desirable texture.
Benefits of smashing burgers:
- Increased surface area for browning
- Enhanced caramelization and Maillard reaction
- Faster cooking time
Cons of Smashing Burgers
On the other hand, critics of smashing burgers argue that the technique causes the loss of flavorful juices. The pressure applied while smashing the patty can squeeze out the natural fats and moisture, resulting in a drier burger. Additionally, the loss of juices can lead to less flavor and a less tender texture.
Drawbacks of smashing burgers:
- Possible loss of juiciness
- Potential for a drier texture
- Risk of overcooking
“Smashing burgers can create a delightful crispy exterior, but be cautious about the potential moisture loss.”
Ultimately, whether you should smash your burgers when cooking comes down to personal preference. If you enjoy a thinner, more caramelized patty with a faster cooking time, then smashing might be for you. However, if you prefer a juicier burger with a more tender texture, it’s best to avoid the smashing technique.
Remember, experimenting in the kitchen is part of the fun of cooking, so feel free to try both methods and decide which one suits your taste buds better. Happy grilling!
Do burgers continue to cook while resting?
Resting meat after cooking is a recommended practice, as it allows the juices to redistribute within the meat for a more flavorful and tender result. But what about burgers? Do they continue to cook while resting?
The answer is yes.
Just like any other meat, burgers continue to cook internally as they rest. The residual heat from the surface of the burger will transfer into the center, causing the internal temperature to rise slightly. This phenomenon is known as carryover cooking.
Understanding carryover cooking
Carryover cooking occurs when the heat from the exterior of the food continues to penetrate into the center, even after it has been removed from the heat source. The larger the cut of meat or thicker the burger, the more significant the carryover effect.
“Resting burgers for a few minutes allows the carryover cooking process to complete, resulting in a juicier and more evenly cooked burger.”
During the resting period, the proteins in the burger continue to denature and set, resulting in a more uniform texture throughout. Additionally, the redistribution of juices that occurs during resting helps to keep the patty moist and flavorful.
Optimal burger resting time
While the exact resting time for burgers may vary depending on their thickness and desired level of doneness, a general guideline is to allow the burgers to rest for 5-10 minutes. This gives the carryover cooking process enough time to complete without the burger becoming too cool.
For those who prefer their burgers cooked to medium-rare, aim for a resting time closer to 5 minutes, while those who enjoy well-done burgers might want to wait a full 10 minutes before serving.
| Burger Doneness | Resting Time |
|---|---|
| Medium-Rare | 5 minutes |
| Medium | 7 minutes |
| Well-Done | 10 minutes |
To ensure your burgers reach the desired doneness and have enough resting time, it’s crucial to use a meat thermometer to check the internal temperature. The recommended internal temperature for ground beef burgers is 160°F (71°C) for the utmost safety.
In summary, while it may be tempting to dig into your juicy burger right away, allow it to rest for a few minutes to fully experience the benefits of carryover cooking. Your taste buds will thank you!
Do you thumbprint burgers up or down?
When it comes to making burgers, there is an age-old debate – should you thumbprint your burgers before grilling? Some argue that creating a small indentation in the center of the patty helps prevent it from shrinking and turning into a dome shape during cooking. Others believe that pressing down on the burger can cause it to lose its juiciness. So, which way should you go – thumbprint up or down?
The thumbprint method
The thumbprint method involves making a slight indentation in the center of the burger patty with your thumb. This indentation is thought to help the burger cook more evenly and prevent it from puffing up in the middle. Proponents of this technique claim that it helps the burger retain its juices and results in a more uniformly cooked patty.
However, critics argue that the thumbprint can cause the burger to lose its natural juices and become dry. They believe that capturing the juices inside the patty by leaving it untouched results in a more flavorful and succulent burger.
The upshot: personal preference
Ultimately, whether you thumbprint your burgers up or down depends on personal preference and the desired outcome. If you prefer a flatter, more evenly cooked patty, then the thumbprint method may be worth trying.
“I’ve tried both methods, and I personally prefer thumbprinting my burgers down. It helps them cook evenly and prevents them from shrinking too much.” – John Doe, Grill Enthusiast.
If you want to preserve the juiciness and natural flavors of the meat, then skipping the thumbprint is the way to go. Experiment with different techniques to find the one that suits your taste and cooking style.
Other factors to consider
While the thumbprint debate continues, it’s important to remember that there are other factors that contribute to a delicious burger. Choosing the right meat blend, seasoning, and cooking temperature are equally important in achieving a perfect burger.
Here are a few tips for making great burgers:
- Select high-quality ground beef with an appropriate fat content.
- Season the patties generously with salt and pepper.
- Cook the burgers over medium-high heat for a few minutes on each side, depending on desired doneness.
- Let the cooked patties rest for a few minutes before serving to allow the juices to redistribute.
Remember, there is no definitive answer to whether you should thumbprint your burgers up or down. It all comes down to personal preference and experimenting with different techniques until you find the perfect burger for you.